I wanted to henna one more time so that I could have a fresh red tint before I go on vacation. With each application, I seem to be getting better with what works best for me.
What did I use?
3 packs of green tea
2 tablespoons of 100% pure honey
gloves
2 plastic shower caps
3 grocery bags
2 old towels
1 box 100g BAQ Jamila Henna
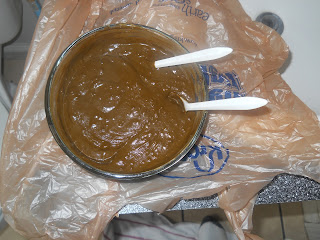
Most people like to let the henna sit over night before applying but I don't have that much time or patience. I boiled 3 packs of green tea for approximately 3 hours. I added the honey right before pouring in the green tea right off the stove. This allows for immediate dye release. As a side note, I added the honey because I read on curlynikki.com that it naturally lightens the hair. I mixed the Jamila Henna Powder 3.5oz (100g)
Then I covered it and let it set for about 20 mins. During that time, I lay two towels on the floor of my bathroom (things can get pretty messy and place two grocery bags on my bathroom sink.) Then, I hopped in the shower and shampooed my hair with Tui Moisturizing Sulfate-Free Shampoo
After shampooing, I stirred the henna one more time and noticed that there was dye release meaning that it was looking more orange-brown than green. Then, I separated my hair into four sections and separated each of those sections into three for a total of 12 sections. The henna was still very warm so I was able to easily smooth the henna from root to end. I would say that it took about 30 minutes to apply it to my entire head while wearing gloves. The henna will stain your hands and nails. After application, I covered my hair with a plastic shower that did not fit my entire head so I ended up covering that with a grocery bag.
I'm telling you that henna treatments are very relaxing. It feels good on your scalp and I guess there's something about taking out time for yourself when you spent the entire week doing everything for everybody else.
The henna was left on my hair for 4 hours. Henna has left my hair pretty dry in the past so I thought that leaving it on for a shorter period of time may rectify this. And it did. This is only my 3rd time doing a henna treatment but, last time, I left it in overnight. Leaving it in for only 4 hours, made it much easier to wash out. It reduced my rinsing time from 1 hour to 20 minutes. On top of that, my hair felt soft and conditioned. Once rinsed out, I applied Carol's Daughter Tui Hair Smoothie (8 oz) and smoothed it through with my detangling brush. Then, I placed another plastic shower cap on my head and left that in for 1 hour.
What I did next will be described in part 2 of this series. Watch out for my review of the curly girl method and Eco Styler gel! Pictures of the henna with the Eco Styler gel are coming soon!

No comments:
Post a Comment